Showing posts with label essie. Show all posts

November 27, 2012

Week 9: Rainbow


Week 9 theme of the 52 week challenge is RAINBOW. This is also the first time I have done this technique on my blog. I decided I'm calling this a dripping paint rainbow.

Just for fun, I painted my nails with matte polish first for a nice contrasting base coat.


So here is my set up: Polishes for the nail I'm doing, 2 cut off plastic cups (one with a couple drops of each polish and one filled with nail polish remover), a thin paint brush or nail art brush, and a folded paper towel.


Below on the left is the red. On the right is after I painted the light pink and hot pink. Not much to this technique. I just dipped the thin paint brush in the polish and painted some thin stripes of alternating lengths.  I did this once with each color, then repeated each color to get a sort of layered look.


In between switching colors, I swished the paint brush in the cup with nail polish remover then wiped it off on the paper towel. 


Here's all the colors I used! (I listed them all left to right)

For Red/Pink:  Burgundy Flirt by Rimmel London, I'm Indi-a Mood for Love by OPI, and Brushstroke blush by Finger Paints


For Orange/Yellow:  Harvest Moon by China Glaze, Peachy Keen by China Glaze, and Pull Over by Sinful Colors


For Green: Navigate Her by Essie and Kissy by Sinful Colors


For Blue: Want my Bawdy by China Glaze, Why Not by Sinful Colors, and I Vant to be A-lone Star by OPI


For Purple: It's an original by Finger Paints and No Plain Jane by China Glaze


phew!! That was exhausting typing all those polish names out. Here's one more pretty dripping rainbow pic!


November 6, 2012

week 6: inspired by a game


Week 6 of the 52 Week Challenge theme is “Inspired by a Game". I couldn’t think of a good idea for the life of me and then I looked at my desk and saw my Rubik’s cube. Not really sure it is considers a game, but I love playing/sloving it :) My best solve time is 1:26. I had to paint it with nail polish because I used it so many times and the colors were wearing off. Anyways, so that was my inspiration!

Here is my left hand with the first two colors.


Here’s the added blue. I just took my time and did it freehand, but you could also use tape for straighter lines.


Then I used a black nail art polish to do black lines separating the colors.


Here’s the steps to the Rubik’s cube I did on my thumb with the black nail art polish.


Here is the right hand with the orange, white and green polish. Turned out pretty good I think!


These are the colors I used. From left to right they are:
Pull Over by Sinful Colors, Why Not by Sinful Colors, Lacquered Up by Essie, Limelight by Ulta, White On by Sally Hansen, and Orange, It’s Obvious! by Essie.


October 23, 2012

week 4: GRADIENT

Week 4 of the 52 week challenge is here and the theme is Gradient or Ombre nails!! This is good explanation on the difference between Gradient, Ombre, and Skittle techniques (when talking about nails). I decided to conquer gradient nails this week. For months, gradient nails have been my archenemy. For some reason, I just could not get this technique to work. I have tried MULTIPLE times and things just were not working out for me. However, I finally got some results! I tweaked a few things in what I was doing and switched the kind of sponge I was using. Tips for best results are at the bottom of this post. Here was my final look:

Colors I used (from left to right): No Plain Jane by China Glaze (Base Coat), Good as Gold by Essie, and Swing Baby by China Glaze (accent color dabbed on top of the tips)

Tips:
-          Here is a good video (The Polished Mommy) to show the technique I did for Gradient nails.

-          Make sure the sponge is saturated to the max! If it is not super saturated you will get a bubbly texture that looks too spongy. However, in the opposite direction if the polish is not soaked into the sponge (just sitting on top), it will not blend well and you will have a hard line between your colors.
      Here is what my sponge looked like ( the sparkly color on the right is Swing Baby which I dabbed on the tips of my nails for a little sparkle)

-          Keep your polishes open so you can quickly saturate the sponge with your gradient colors in between rolls.

-          If you use a sheer polish make sure it is the same as your base coat. In the video in the first tip, she uses black for a base coat. This only worked because her top/gradient polishes were opaque. The purple I used for this look was very sheer, so I made sure to use the purple as my base coat as well.

-          Layer your “rolls” of the sponge so the line between the colors doesn’t always match up.  This helps you have more of a gradient and less of an immediate change between the colors.

-          If the sponge you’re using isn’t working for you, try a different one. The old brand of sponge I tried was making my look to bumpy and bubbly. These sponges worked out well for me.
-          Cut the sponge in half to conserve sponges!

-          For skin clean up, use a plastic cup cut off filled with polish remover and an eyeliner brush. Dip your brush in the polish remover and wipe on a paper towel in between cleaning of the finger. (after you use an eyeliner brush for polish remover, do not use it for your face again)


 TA DA!!!! I’m so happy it finally turned out good!


October 15, 2012

Combo: Teal+Glitter+Matte

So I just broke my middle nail. It was a sad, sad day. I hate when my nails are different lengths so I had to cut the rest! So sad. So I needed a cute combo that looked good on my teeny tiny nails. I think the matte coat really made the Teal color look velvety. I love it! And Usually I don't like matte top coat on top of a sparkle/glitter polish but since this one was such a fine glitter... I made an exception :)


I did the teal on all nails first (Fly by OPI). Then on the 2nd and 4th finger I painted 2 coats of Kissy by Sinful Colors. Then to top it off one coat of Matte About You by Essie.


Tada! there you have it. Simple but very attractive combo.

October 12, 2012

Technique: Freehand Fishtail

I just saw this technique the other day on Reddit Laqueristas. It looks sort of like a fishtail braid. I've seen people do it much thicker than this, but if you layer the polish swipes you can get the stripes much thinner... like this!


After you've done your top coat on all 10 nails, set up all your striping polishes unscrewed in the order you want to use them. Here is mine all set up. Colors from left to right are: Why Not by Sinful Colors, Orange It's Obvious! by Essie, Houston we have a Purple by OPI, Fly by OPI, and Electric Pineapple by China Glaze.


Here's a step by step pic tutorial of how I did this fishtail look. Basically its just an alternating layered striping technique. You just use the polish brush for the stripes. The last step is in the next pic.


After you finish the striping you cover up the bottom in your base color. I used a nail art brush for better control.


Tips:
- Use a thin polish if you can and make your stripes as thin as you can.  The thinner the stripes the less the layers mix together.
- Use a sheer polish if you want the layer overlaping to show up.
- GO SLOW. this is why I only did two nails each hand. I had to go very slow to paint in a straight line.
- to have more control of your brush, steady your "painting hand" on the surface your painting. i.e. rest the pinky or ring finger of your painting hand on the table your left hand is resting on. This should steady your hand a little bit.


June 12, 2012

Technique: Summer Stripes

These fancy stripes are such a fun summer look! They take a little bit of time, but they are worth it. I’ve gotten tons of complements since I did these nails.


These fancy stripes are such a fun summer look! They take a little bit of time, but they are worth it. I’ve gotten tons of complements since I did these nails.

The way I usually do taping is to tape one whole hand first. I suggest taping your least dominant hand first because your second hand will have to be done with wet nails. 

After your taping is done on your one hand, start with the painting. Before you start, Set up your bottles on a paper towel opened and in the order you want to use them. This way you can paint and remove tape quickly. 

Colors I used (left to right): Fly by OPI, Fiercely Fiona by OPI, and Orange, It's Obvious! by Essie
Paint one nail at a time, and remove the tape immediately after taping. Below is the first painted nail before the tape is removed. Try to not run the paint into each other so your brush colors don’t mix.


Don’t forget to finish with a good topcoat! Don’t want all your hard work to chip right away. Make sure your nails are dry before you apply topcoat.

Good luck and happy summer times ;)

May 17, 2012

Technique: Matte + Sparkle Tips


I've been MIA for a while on this blog. I had a rough couple of weeks and then was out of the country so no posts for about a month....
But now I'm back :)
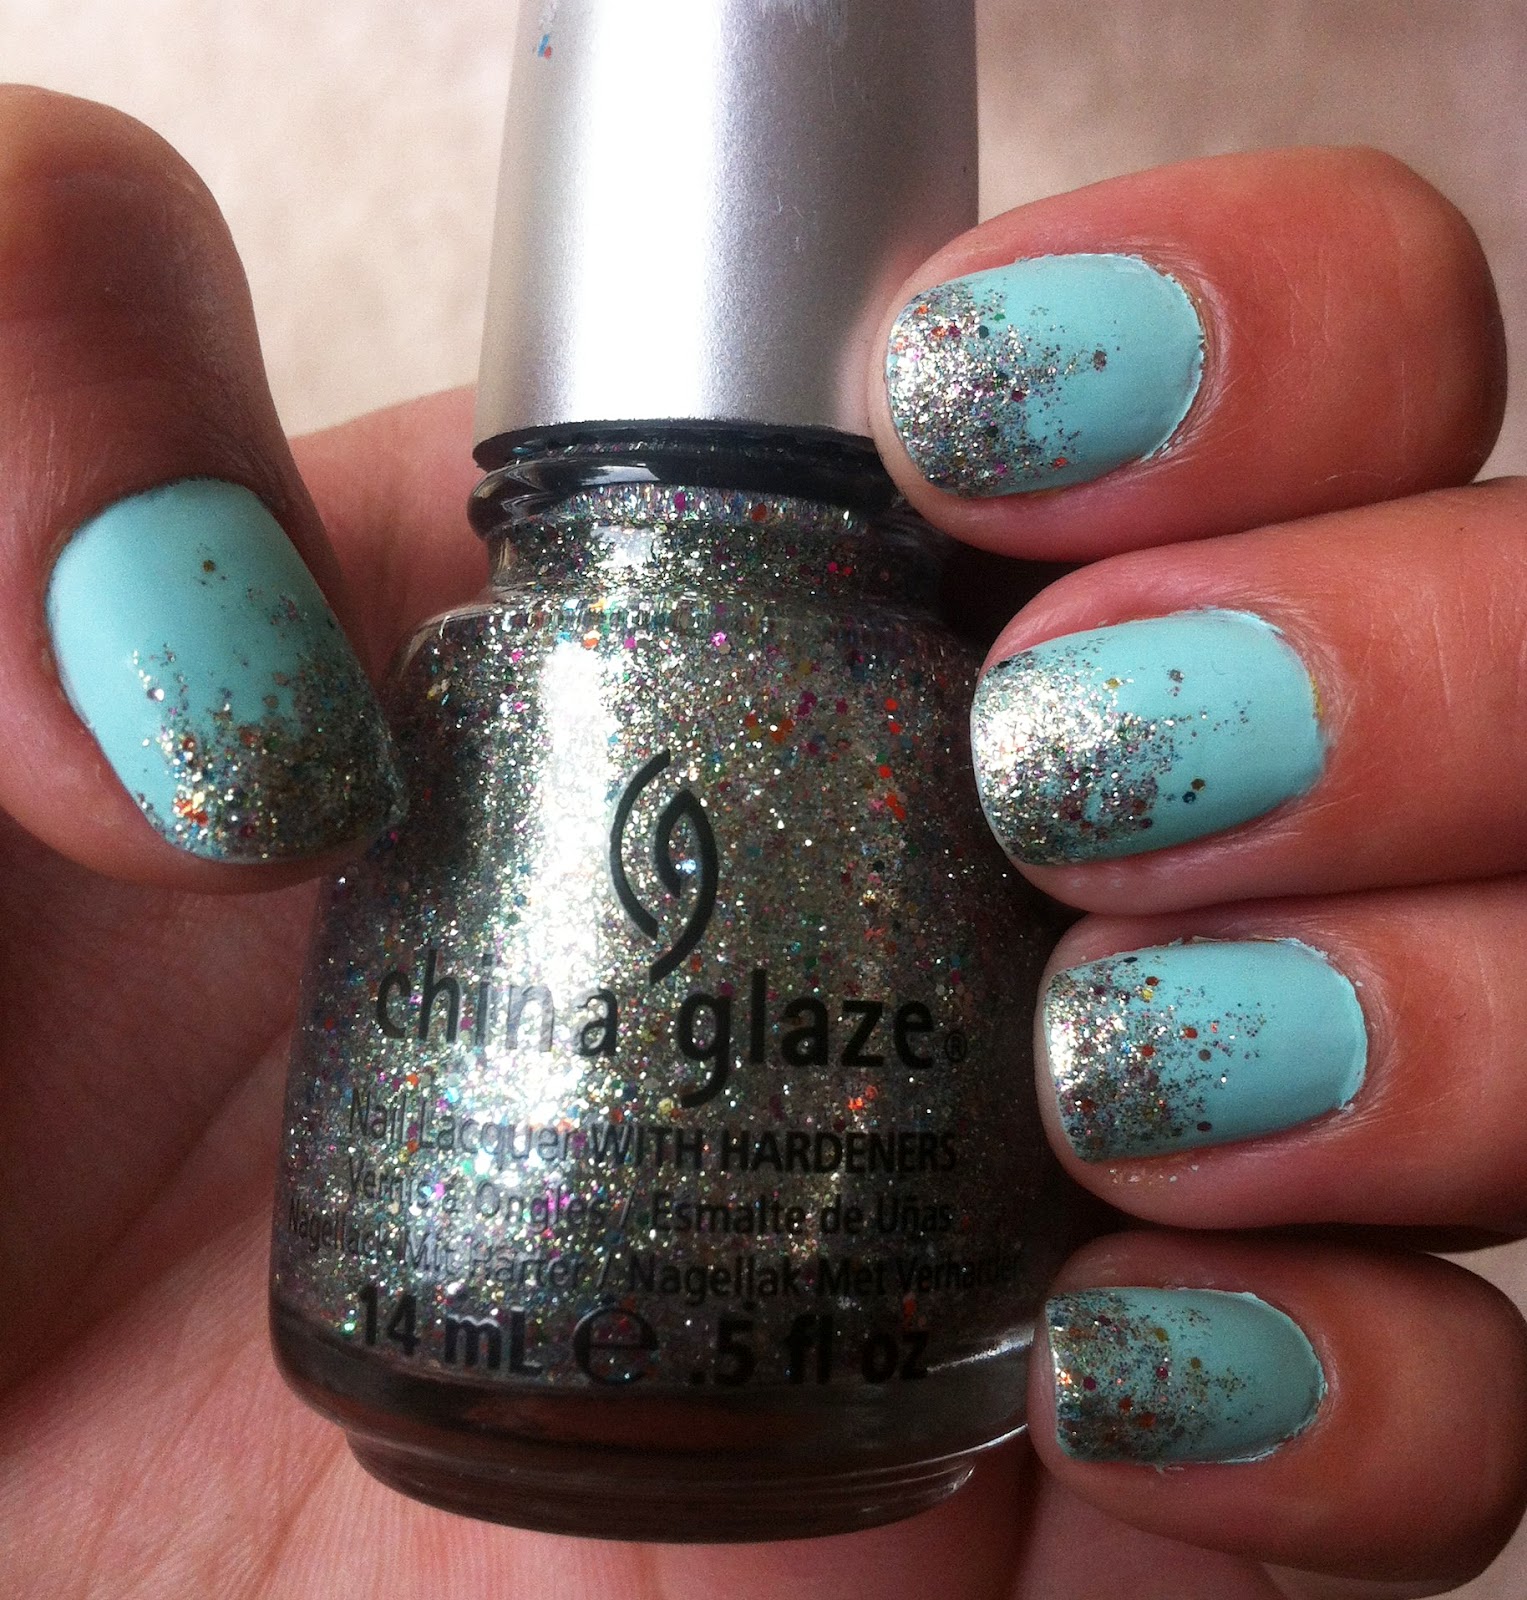
I am just obsessed with greens lately. Chartreuse, avocado, pistachio, and most of all MINT. I found this glitter that I just had to have and when I took it home I realized it would look gorgeous with a mint polish.
I was bored of the plain old sparkle tips so I added some Matte in the mix. Tip: do NOT put the Matte top coat over a glitter polish. It looks icky... trust me. 

So the order goes... 2 coats of color polish (I used Mint Candy Apply by Essie). 1 coat of matte top coat (I used Matte About You by Essie)... This isn't a great pic but you get the idea.


Then sparkle tips. This really only works with highly concentrated glitter polish. This one is Ray-Diant by China Glaze. The key to the sparkle tips is to do very thin strokes of the glitter. then when you have the tip done dab a few straggler glitter pieces more towards the bottom of the nail. 

If your like me and hate the feel of these kinds of glitter polish you can cover the glitter part with a clear top coat. Just be careful not to cover the matte portion!

Viola! a great contrast of Matte and Sparkle :)

April 24, 2012

Critique: Matte About You


Haven't posted in a while... There's been a lot goin on in my life lately. Nevertheless I am back! Above is my new favorite find: Matte About You by Essie. If you are looking to try matte polish, I would say this is your very best option. Why buy a Matte color polish when you can transform ANY of your polishes to a matte finish with this one top coat? I got it for $10 at Ulta.

In my opinion, the matte top coat looks best over a shiny/shimmery color. The matte finish makes this cheap outdated color of polish look chiq again! This Sinful Colors polish in Gorgeous took 3 coats to be opaque, and I still didn't love the color. It doesn't look at all how it did in the bottle (Shoulda tryed it on in the store!). 


BUT no worries, one coat of Matte About You and it transformed this outdated color into a whole new look! I loooove it!


And here is a before and after comparison:


I also tried the matte finish on a solid (non glittery or shiny) color. This one is a great new pistachio color called Navigate Her by Essie. I think this still looks cool, but I almost like bold colors better shiny I think. Matte def looks better over a shimmer polish in my opinion. 


Still pretty cool though! I love experimenting with this matte top coat. Such a great purchase :)


January 14, 2012

Technique: Accent Heart

The Accent Heart


For this technique I used 2-3 coats of a dark color (here “Dive Bar” by Essie) with a small accented heart in a lighter version of the base color (here “Gorgeous” by Sinful Colors). 


An easy way to find a good accent color is to concentrate on the shine or sparkle of the base color. In this pic you can see that Dive Bar gives off a turquoise/aqua glow, almost the same exact color as the Gorgeous color I picked for this accent heart.

If you are using a solid or matte color for your base coat this trick wont apply but I will make a post on solid/bright colors later ;)


To actually make the heart I used the pointed end of a cosmetic Q-tip. These Q-tips are awesome for accents or fixing mess-ups. Very handy! I made sure the Q-tip had a good blob of nail polish on the tip and started at the “humps” of the heart. From there you can drag the blobs down to a point to form a heart and just adjust with a new clean Q-tip or even toothpick if you need to fix some edges. 

Voila! Don't get frusturated if you can't make it perfect the first time. I sure didn't ;) just keep at it and only do one nail if you want. It's more classy anyway.