Showing posts with label matte. Show all posts

November 8, 2012

Combo: Smoldering + Fowl Play

Yesterday, I was having a very hard time being inspired nail-wise. So I picked up a few polishes, walked over to my boyfriend, and asked “Which of these goes together well?”. I just love him. His response was, “Well, these two don’t ‘go together’, but I think they would look cool together”.  So this combo is all because of him, Thanks babe :). I think it turned out great!

First/Base Coat:  Smoldering by Revlon. This silver is really pretty because at first glance it looks like a plain old metallic silver, but when you move the nail you can see a little pale pink duo-chrome goin’ on.

Taping! This is just a simple vertical taping. Same old drill (Tape all of one hand, paint one nail, remove tape immediately, paint next nail, repeat…)


Second Coat: Fowl Play by Orly. I really couldn’t quite capture the beauty of this polish. It is so dynamic. It is a dark purple with a flaky pink and red glitter. I can stare at it all day!

Top Coat: Matte About You by Essie. I loooooove Fowl Play with the matte coat on top. You can see it better and it looks very modern.

Here’s some more pics!

October 15, 2012

Combo: Teal+Glitter+Matte

So I just broke my middle nail. It was a sad, sad day. I hate when my nails are different lengths so I had to cut the rest! So sad. So I needed a cute combo that looked good on my teeny tiny nails. I think the matte coat really made the Teal color look velvety. I love it! And Usually I don't like matte top coat on top of a sparkle/glitter polish but since this one was such a fine glitter... I made an exception :)


I did the teal on all nails first (Fly by OPI). Then on the 2nd and 4th finger I painted 2 coats of Kissy by Sinful Colors. Then to top it off one coat of Matte About You by Essie.


Tada! there you have it. Simple but very attractive combo.

September 26, 2012

Technique: lace + mint

So a couple months ago, I kind of just gave up on blogging. I was being way too much of a perfectionist about it and wouldn’t post nails/pics unless they were flawless. It started to get really frustrating and time consuming; not at all what I started the blog for in the first place. However, I recently came across reddit.com/r/RedditLaqueristas and instantly became inspired. The positivity and enthusiasm on the site has motivated me to keep polishing and keep blogging- sans perfection. So who cares if I couldn’t perfect this next technique. At least I gave it a shot :)
So this technique is supposed to look like a corner of lace.. but I did it quite fast so it didn’t turn out the best. I actually think I should have stopped after the first set of dotting but it still looks pretty, even if you can’t tell its lace.

I started with 2 coats of this pretty mint polish (Re-Fresh Mint by China Glaze). I’ve noticed that for mint polishes they always look a little darker on your nails than in the bottle. So when picking out a mint, pick a little lighter shade than you want. This one almost looks pastel blue in the bottle, but is a perfect mint on my nails.


For the start of my accents (only did 3 nails each hand) I made a little cloud looking shape in the corner of my nails. I used a French manicure pen for this because I felt it gave me more control for the half circles than a brush would. I had to color the clouds in twice because the French manicure polish in the pen is pretty thin.
Next, to give it more of a frayed lace look, I dotted around the edges of these little humps. I’m thinking this step could be skipped if you use a color other than blue for your base coat. I did this to make it look less like clouds and more like lace.


For the next step of the lace look, I used a dotting tool. I’ve heard of some people also using pins stuck in erasers, works the same I would assume. Basically, I started by putting 3 small dots under each “hump”.  I think this is enough to make it look like lace, but I was feelin’ fancy so I added some more dots and hearts.

Here is the final look with a coat of Seche Vite. I planned on adding a matte coat, but I did a top coat of Seche Vite first to level out the dots/designs. At the top is the final look with the matte coat. I think the matte made it look more like lace, but the shinny coat looks nice too!


Yay for polishing and posting again!! I’m excited :)

May 17, 2012

Technique: Matte + Sparkle Tips


I've been MIA for a while on this blog. I had a rough couple of weeks and then was out of the country so no posts for about a month....
But now I'm back :)
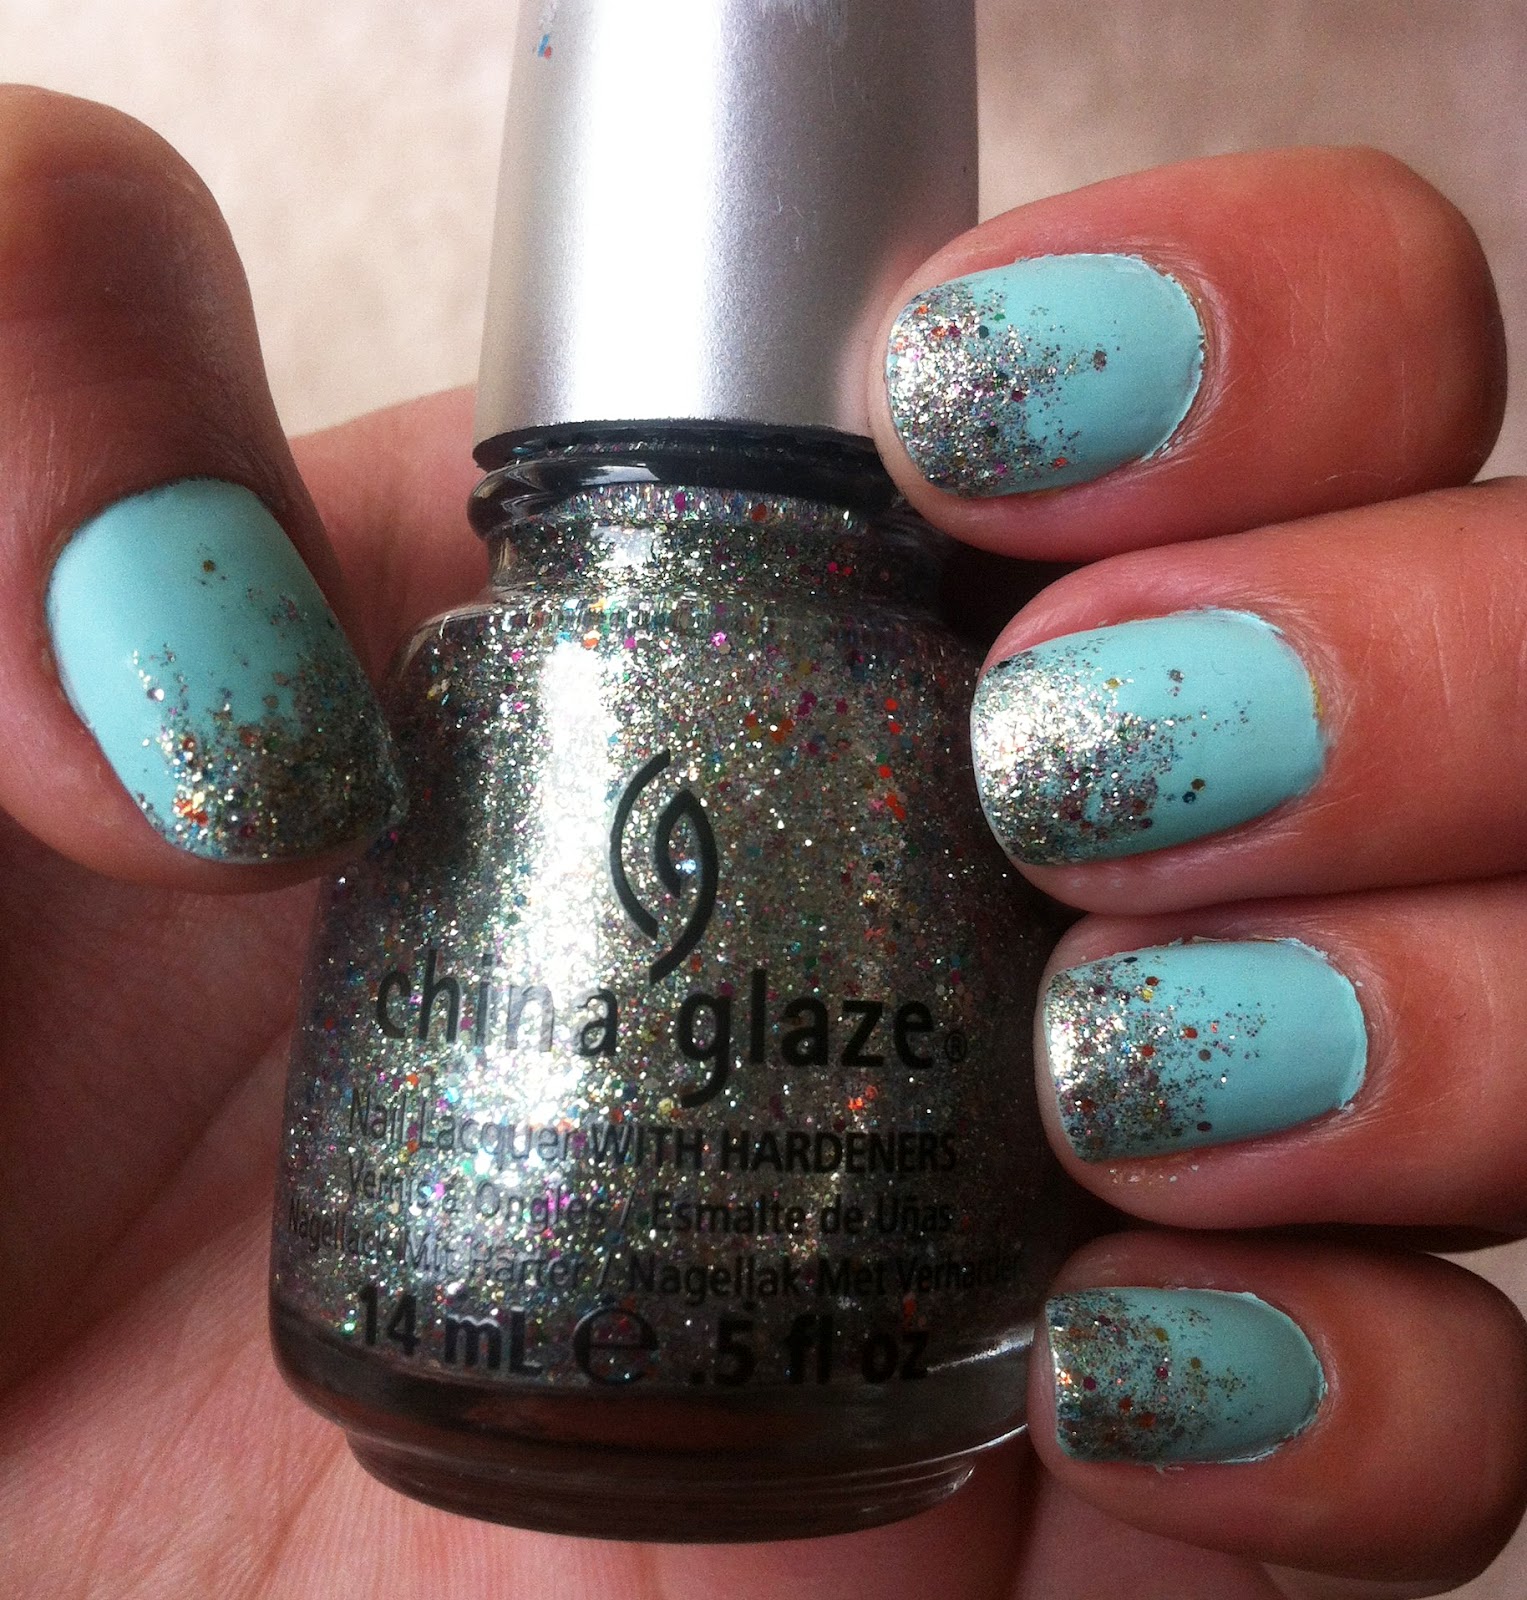
I am just obsessed with greens lately. Chartreuse, avocado, pistachio, and most of all MINT. I found this glitter that I just had to have and when I took it home I realized it would look gorgeous with a mint polish.
I was bored of the plain old sparkle tips so I added some Matte in the mix. Tip: do NOT put the Matte top coat over a glitter polish. It looks icky... trust me. 

So the order goes... 2 coats of color polish (I used Mint Candy Apply by Essie). 1 coat of matte top coat (I used Matte About You by Essie)... This isn't a great pic but you get the idea.


Then sparkle tips. This really only works with highly concentrated glitter polish. This one is Ray-Diant by China Glaze. The key to the sparkle tips is to do very thin strokes of the glitter. then when you have the tip done dab a few straggler glitter pieces more towards the bottom of the nail. 

If your like me and hate the feel of these kinds of glitter polish you can cover the glitter part with a clear top coat. Just be careful not to cover the matte portion!

Viola! a great contrast of Matte and Sparkle :)

April 24, 2012

Critique: Matte About You


Haven't posted in a while... There's been a lot goin on in my life lately. Nevertheless I am back! Above is my new favorite find: Matte About You by Essie. If you are looking to try matte polish, I would say this is your very best option. Why buy a Matte color polish when you can transform ANY of your polishes to a matte finish with this one top coat? I got it for $10 at Ulta.

In my opinion, the matte top coat looks best over a shiny/shimmery color. The matte finish makes this cheap outdated color of polish look chiq again! This Sinful Colors polish in Gorgeous took 3 coats to be opaque, and I still didn't love the color. It doesn't look at all how it did in the bottle (Shoulda tryed it on in the store!). 


BUT no worries, one coat of Matte About You and it transformed this outdated color into a whole new look! I loooove it!


And here is a before and after comparison:


I also tried the matte finish on a solid (non glittery or shiny) color. This one is a great new pistachio color called Navigate Her by Essie. I think this still looks cool, but I almost like bold colors better shiny I think. Matte def looks better over a shimmer polish in my opinion. 


Still pretty cool though! I love experimenting with this matte top coat. Such a great purchase :)