Showing posts with label white. Show all posts

December 2, 2012

Week 10: winter


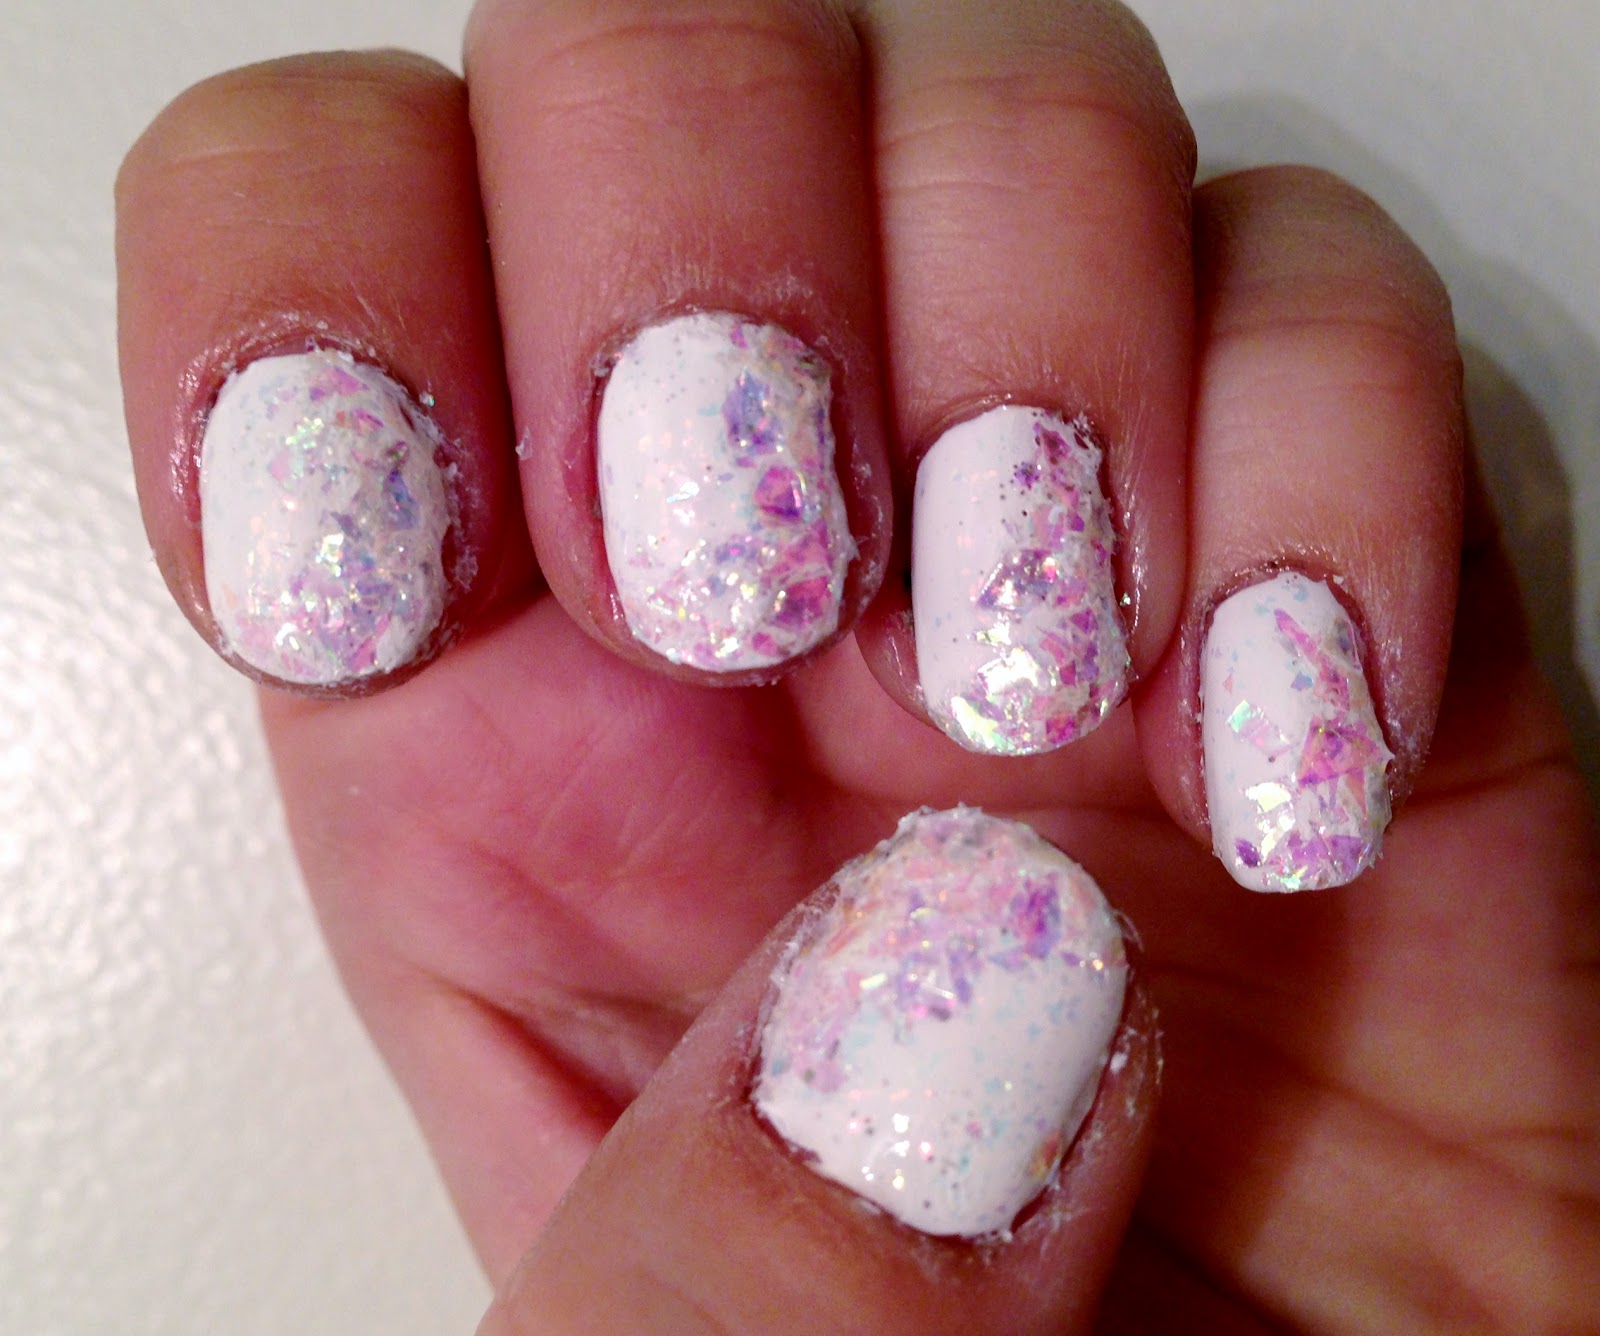
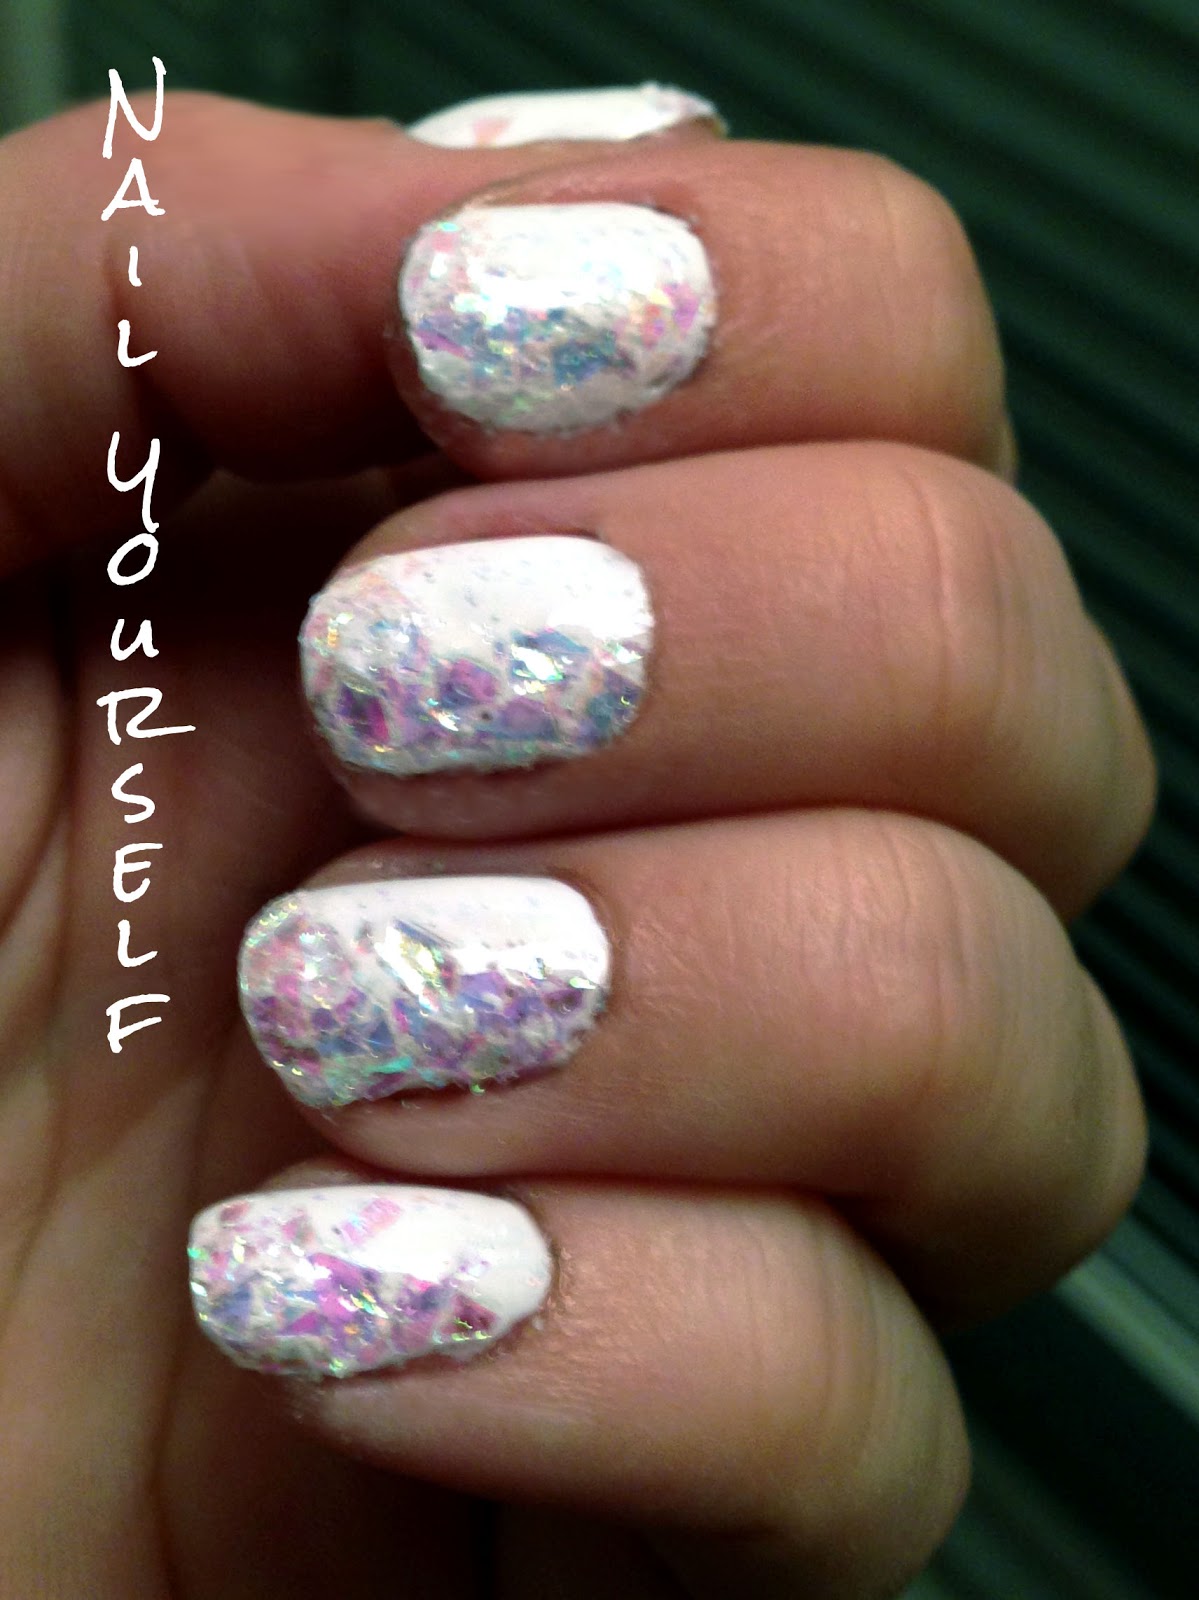
It is week 10 of the 52 Week Challenge and the theme is Winter. The inspiration of this mani was cracked ice next to snow, kind of like the edge of a frozen pond.

Step 1: Paint nails white


Step 2: paint a coat of Snowflakes by Color Club (or Shine of the Times by Essie)


Step 3: Use clear nail polish to paint a half moon shape on your nail then place glitter immediately to that half moon of polish.
(this loose glitter is from Sally Beauty Supply and it is called Cracked Ice in Mother of Pearl by So Easy) 


Step 4: Paint on 2 thick coats of clear topcoat.


November 12, 2012

Technique: Create Your Own Ombre


Surprisingly, this is the first time I have attempted an Ombré. I guess I have been so involved in new and more complicated techniques so I haven’t attempted it. This week is the 7th week of the 52 Week Challenge and the theme is black and white. I haven’t done a black and white look yet, nor have I done an ombré so I decided to do this Create Your Own Ombré technique!

Basically the “create” part is just mixing some polishes. I really didn’t have the perfect colors for a black to white ombré so I created my own! Below are the 3 polishes I used. Black by Finger Paints, grey by Essie (not sure of actual name, woops!), and White On by Sally Hansen.

I started by painting these polishes by themselves on my pinky (White On), middle finger (grey), and thumb (Black). (sorry for the blurry pic!)

Mix 1: Then comes the mixing. For the ring finger color, I mixed equal drops of White On and the Grey polish. I used a cut off solo cup to hold the polish.

I just mixed it with the grey polish brush. You could use a separate brush if you are really worried about your middle color getting contaminated, but I made sure to drop all the polish I needed before I did my mixing. Then I painted both my left and right ring fingers this light grey color.

After you are done painting your ring fingers, wipe the brush you just used completely on a paper towel (do not use tissue or TP as that will leave paper residue on the brush). If you need to add a little polish remover to the paper towel, however I didn’t feel it was necessary.

Mix 2: Then I did the same thing as Mix 1, but with Black instead of white (equal drops Black and Grey). I then painted both my index fingers the dark grey mixed color.

Voila here is my black to white Create Your Own Ombré!!

Tips for the Create Your Own Ombré:
- Whatever you paint on your left hand, paint on your right hand immediately. This way is the most efficient and you don’t risk having mismatched mixed colors.
i.e. paint in this order: left pinky, right pinky, left middle, right middle, left thumb, right thumb, Mix 1, left ring, right ring, Mix 2, left index, right index.

- Make sure you make enough mixed polish to do 2 coats on 2 fingers. I used about 6-8 drops of each polish.

- For any ombré, make sure you use ALL crème or solid polishes or use ALL shiny polishes. It looks odd if you have a couple shiny/sparkly nail and the others are solid colors.

- Try to avoid sheer polishes with this technique! They will be very difficult to mix correctly and your ombré may not look just right.

- Here are some good 3 polish color combos that would work great for this Create Your Own Ombré technique.
       1. Red, Orange, Yellow
       2. Green, Blue, Purple
       3. Pale/light, Bright, Dark of any color.
Below is an example of a good light to dark blue trio. [Sea Spray by China Glaze, Dating a Royal by OPI, and Up All Night by China Glaze.]


This is super easy and fun! I will definitely be trying this many more times!!
 

November 6, 2012

week 6: inspired by a game


Week 6 of the 52 Week Challenge theme is “Inspired by a Game". I couldn’t think of a good idea for the life of me and then I looked at my desk and saw my Rubik’s cube. Not really sure it is considers a game, but I love playing/sloving it :) My best solve time is 1:26. I had to paint it with nail polish because I used it so many times and the colors were wearing off. Anyways, so that was my inspiration!

Here is my left hand with the first two colors.


Here’s the added blue. I just took my time and did it freehand, but you could also use tape for straighter lines.


Then I used a black nail art polish to do black lines separating the colors.


Here’s the steps to the Rubik’s cube I did on my thumb with the black nail art polish.


Here is the right hand with the orange, white and green polish. Turned out pretty good I think!


These are the colors I used. From left to right they are:
Pull Over by Sinful Colors, Why Not by Sinful Colors, Lacquered Up by Essie, Limelight by Ulta, White On by Sally Hansen, and Orange, It’s Obvious! by Essie.


November 4, 2012

Combo: Fresh Winter Snow

Ugh I am so embarassed. I had an old copy of the schedule so I thought that week 6 of the 52 week challenge was winter, but it is not! Whoops, it is actually "Inspired by a Game" so I guess I will have to do some new nails tonight! Darn it... the one week that I actually did it early haha oh well. Here's a pretty sparkly pale blue combo!

It's not quite winter weather yet here in the Chicago land area, but hey this combo is still pretty to look at :). I went for a simple combo of polishes to make a fresh winter snow look.


First polish: 2 coats of a pale blue or white polish. I used "I Vant to Be A-lone Star" by OPI


Second polish: 1 coat of a sheer, iridescent polish. I used "Rainbow" by China Glaze


Third polish: 1 or 2 coats of a pearlescent glitter. I used "Make a Spectacle" by China Glaze


Here's one more pic, but the one at the top of this post definitely looks the best on how this turned out.


October 23, 2012

week 3: REDDIT!

This is a little late since it is already week 4 of the 52 week challenge… but better late than never! I actually did paint these on last week for week 3; I just delayed doing a post about them. The theme last week was inspired be Reddit. So for my design I did my interpretation of the Reddit alien. Ended up being pretty fun and easy nail art. So here it is! I’ll do a post about week 4 in a little bit.


September 26, 2012

Technique: lace + mint

So a couple months ago, I kind of just gave up on blogging. I was being way too much of a perfectionist about it and wouldn’t post nails/pics unless they were flawless. It started to get really frustrating and time consuming; not at all what I started the blog for in the first place. However, I recently came across reddit.com/r/RedditLaqueristas and instantly became inspired. The positivity and enthusiasm on the site has motivated me to keep polishing and keep blogging- sans perfection. So who cares if I couldn’t perfect this next technique. At least I gave it a shot :)
So this technique is supposed to look like a corner of lace.. but I did it quite fast so it didn’t turn out the best. I actually think I should have stopped after the first set of dotting but it still looks pretty, even if you can’t tell its lace.

I started with 2 coats of this pretty mint polish (Re-Fresh Mint by China Glaze). I’ve noticed that for mint polishes they always look a little darker on your nails than in the bottle. So when picking out a mint, pick a little lighter shade than you want. This one almost looks pastel blue in the bottle, but is a perfect mint on my nails.


For the start of my accents (only did 3 nails each hand) I made a little cloud looking shape in the corner of my nails. I used a French manicure pen for this because I felt it gave me more control for the half circles than a brush would. I had to color the clouds in twice because the French manicure polish in the pen is pretty thin.
Next, to give it more of a frayed lace look, I dotted around the edges of these little humps. I’m thinking this step could be skipped if you use a color other than blue for your base coat. I did this to make it look less like clouds and more like lace.


For the next step of the lace look, I used a dotting tool. I’ve heard of some people also using pins stuck in erasers, works the same I would assume. Basically, I started by putting 3 small dots under each “hump”.  I think this is enough to make it look like lace, but I was feelin’ fancy so I added some more dots and hearts.

Here is the final look with a coat of Seche Vite. I planned on adding a matte coat, but I did a top coat of Seche Vite first to level out the dots/designs. At the top is the final look with the matte coat. I think the matte made it look more like lace, but the shinny coat looks nice too!


Yay for polishing and posting again!! I’m excited :)

February 17, 2012

Tip: White makes it BRIGHT


This is the most simple and cheap tip ever. In this post, I used 3 colors from a cheapo nail polish set I got from Claire’s. The point of the tip is to make any shear polish really pop. The above photo was taken on a verrrry cloudy day and look how bright pink the polish looks!


To make bright shear polishes even brighter, all you have to do is start with one even coat of bright white nail polish. On top of that you will only need one even and light coat of your color nail polish. To the left are 2 photos of examples I did. In each photo, the left finger has 2 coats of the nail polish alone, and the right finger has 1 coat of white and 1 coat of the color.

The difference is clear (and not shear haha). The left finger in each photo you can even see the whites of my nail, which means if you get dirt under your nails you’ll still be able to see it... gross. Below is just another picture of the difference in color. 


Another pro of this tip, it doesn’t just look neon in the daytime... Because you are putting a white underneath a shear, your nails will also glow under a black light. Looks awesome at a night club ;) 

January 12, 2012

Technique: Snowy Sparkle Tips


Snowy Sparkle Tips

In honor of the first snow fall of winter, I am making my first post my snow flake inspired sparkle nails. I used Sally Hansen Gem Crush. This is a new line by Sally Hansen that I absolutely loveeee because it has two different colors and sizes of glitter in it. It's great for pairing with alike colors or mixing with other glitter polishes. The color I used here is 01 Showgirl Chic, on top of a french tip white. 

Technique: I started with two coats of the white polish and made sure to let that dry well, so it doesn't blend with the glitter nail polish. Then I put a good amount of the Gem Crush polish on the tip of the nail. With the tip of the polish brush I dragged some of the Gem Crush down from the tip to make it look like the glitter was fading into the white part of the nail. Lastly I finsihed with a good clear top coat. I noticed that sparkle polish chips a lot easier than regular polish so definitely dont forget the top coat!