May 17, 2012

Technique: Matte + Sparkle Tips


I've been MIA for a while on this blog. I had a rough couple of weeks and then was out of the country so no posts for about a month....
But now I'm back :)
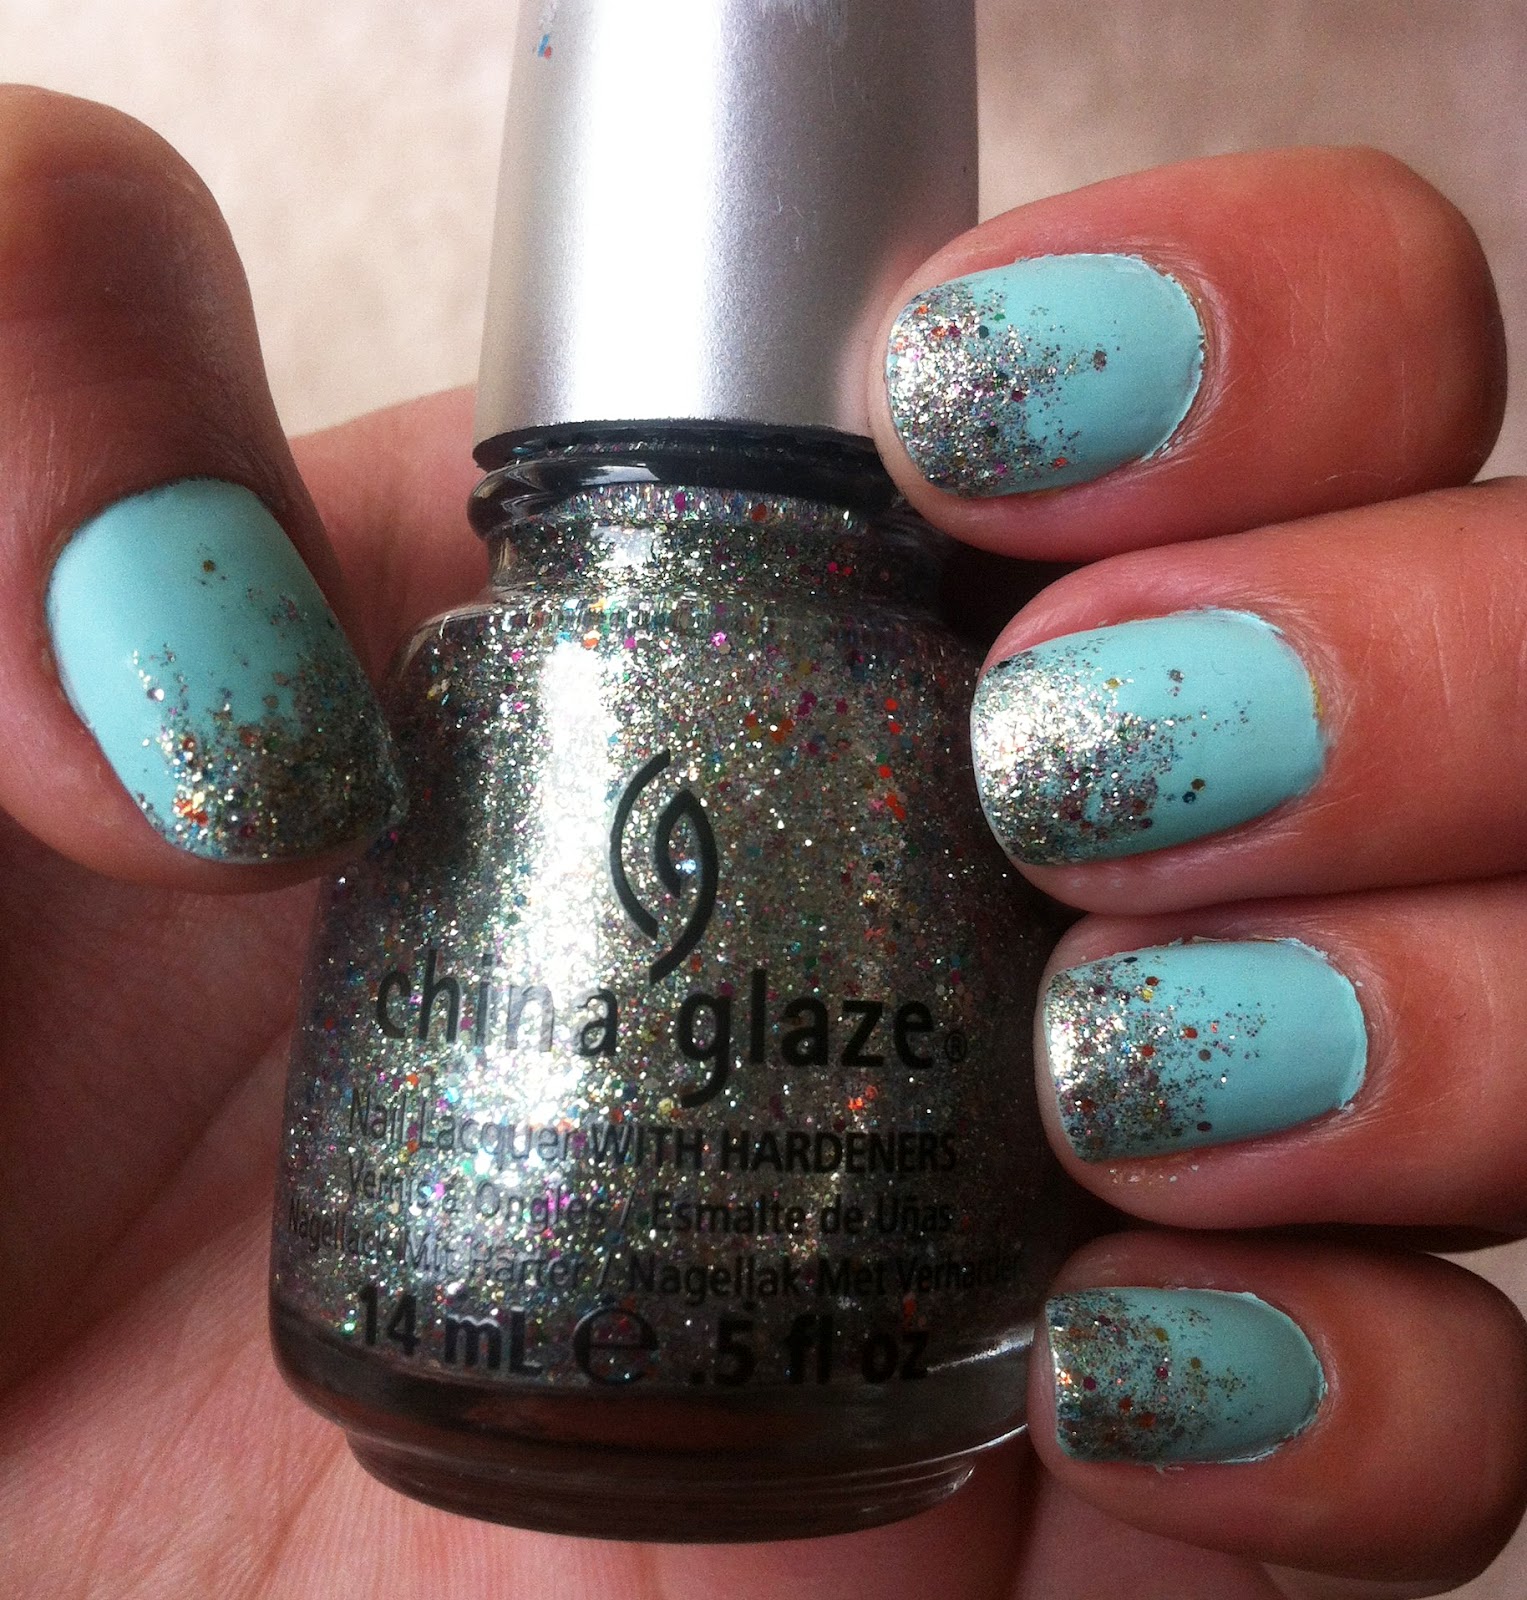
I am just obsessed with greens lately. Chartreuse, avocado, pistachio, and most of all MINT. I found this glitter that I just had to have and when I took it home I realized it would look gorgeous with a mint polish.
I was bored of the plain old sparkle tips so I added some Matte in the mix. Tip: do NOT put the Matte top coat over a glitter polish. It looks icky... trust me. 

So the order goes... 2 coats of color polish (I used Mint Candy Apply by Essie). 1 coat of matte top coat (I used Matte About You by Essie)... This isn't a great pic but you get the idea.


Then sparkle tips. This really only works with highly concentrated glitter polish. This one is Ray-Diant by China Glaze. The key to the sparkle tips is to do very thin strokes of the glitter. then when you have the tip done dab a few straggler glitter pieces more towards the bottom of the nail. 

If your like me and hate the feel of these kinds of glitter polish you can cover the glitter part with a clear top coat. Just be careful not to cover the matte portion!

Viola! a great contrast of Matte and Sparkle :)

April 24, 2012

Critique: Matte About You


Haven't posted in a while... There's been a lot goin on in my life lately. Nevertheless I am back! Above is my new favorite find: Matte About You by Essie. If you are looking to try matte polish, I would say this is your very best option. Why buy a Matte color polish when you can transform ANY of your polishes to a matte finish with this one top coat? I got it for $10 at Ulta.

In my opinion, the matte top coat looks best over a shiny/shimmery color. The matte finish makes this cheap outdated color of polish look chiq again! This Sinful Colors polish in Gorgeous took 3 coats to be opaque, and I still didn't love the color. It doesn't look at all how it did in the bottle (Shoulda tryed it on in the store!). 


BUT no worries, one coat of Matte About You and it transformed this outdated color into a whole new look! I loooove it!


And here is a before and after comparison:


I also tried the matte finish on a solid (non glittery or shiny) color. This one is a great new pistachio color called Navigate Her by Essie. I think this still looks cool, but I almost like bold colors better shiny I think. Matte def looks better over a shimmer polish in my opinion. 


Still pretty cool though! I love experimenting with this matte top coat. Such a great purchase :)


April 7, 2012

Critique: Nail Art Tools


This critique was made for all you nail art lovers that haven’t been having any luck with it. I am providing my knowledge on the 4 nail art tools that I have tried so far. I have them listed from best to worst (also left to right in the above picture).


1. Double up Detailing/Dotting Nail Brush by So Easy- $5.50
I got this double-ended nail brush from Sally Beauty online. One side is for making perfect dots and the other end is the nail brush. This seems like a deal to me for $5. The best part about buying a brush is that you can use it with annnnny polish you want. All you do is drop a few dots of nail polish on a napkin or paper and dip the brush in. You do have to re-dip pretty often though to get a good line. When you’re done all you do is swish it around in some nail polish remover and wipe with a paper towel.  Only draw back is that it isn’t as is of a line as I’d like. But you could always buy thinner nail art brushes! I am even thinking of cutting a few bristles from this brush to make it thinner.

SUMMARY: Unlimited polish color possibilities, double ended, only have to pay $5 once.


2. Stripe Rite Polish by So Easy (.25oz) - $4
This guy really almost ties for first with the nail brush. This polish is super easy to use, draws very thin lines, and gives you a lot of polish for the price it is. Only reason it falls under the above brush is because you have to buy a new Stripe Rite polish every time you need a different color. What I would do is buy this polish in the staple colors that you know your going to use more than once (i.e. white, black, silver, gold). Then for any other color use the nail brush above. These can also be bought at Sally Beauty.

SUMMARY: great control, great value, 30+ colors


3. Nail Art Pen by Salley Hansen (.067oz)- $7
Obviously this pen is the worst value (least amount of polish, highest price). However, It does have some things going for it. First of all is convenience. I am sure you all have seen these pens at Walgreens or Target etc... So this is probably the most popular for nail art right now. Normally, I would definitely tell you to only go with the first two choices for nail art, however this pen is very easy to use/control. If your not the most artistic person in the world, then this would be a good choice for you. Especially if you only want to do a couple nail art dots or stripes every once and a while.

SUMMARY: worst value, easiest control, very convienent, only 11 colors


4. Nail Art Pen by Cina (.16oz)- $6
This pen pretty much stinks. The whole point of a nail art pen is that it can draw thin lines. This pen drew just about as thick as a regular nail polish brush... Sooo no point. Just as expensive as a polish and not useful as a nail art tool. Waste of $6! Oh well, learned my lesson.

SUMMARY: Too thick of lines, horrible value, just don’t buy it haha.


April 4, 2012

Technique: Argyle Tips

 This technique is a modern take on a classic pattern. The best part is... it’s pretty easy and doesn’t take long to do. Argyle is a cute preppy pattern, but also very detailed and usually needs to be perfect to look good. These tips only use a tiny portion of the pattern so it isn’t difficult at all!


The first step was obvi the base coat. I used a very sheer pink. I needed 4 coats of this pale pink Essie polish to get the color I wanted. I let this dry a loooong time before I did the next step.


Next was the taping! Since this is a look for your tips I had to be careful not to do a half and half diagonal. To do this I made sure that the tapes did not go corner to corner, but a little but higher than that. To the left is the diagonal tips in Mod Square by Essie (my favvvv pink right now).


Lastly was the dots in the opposite direction. The polish I used was Essie in Mint Candy Apple. I used a dotting tool for these diagonal dots so it was pretty easy. If you don't have a dotting tool you can use a pin head or bobby pin. Seche Vite top coat then I was done!

Below is the final look! I just looooove this look and I will most definitely wear it again!

|La


March 27, 2012

Technique: Moon Phases

Phases of the Moon

This look was inspired by the phases of the moon. It was actually quite simple. The only difficult part was making my right hand’s “moons” look symmetrical to my left.


First step was the shinny color for the moon. I think a silver, gold or grey would look good for this. The color I used was China Glaze in “Swing Baby”. It’s a light gold with a pale pink tint to it. VERY pretty. I wore this one by itself for a day before I did my moon phases just because I liked the color so much. To the left is this base coat, 2 coats.


Next was taping. As always, nails have to be COMPLETELY dry before taping. I used French tip tapes for this look. On the left, starting with the pinky (1) I gradually tapped less to more of my nail. Nails 1, 2, and 3 I used the bottom of the arc as a guide. For nails 4 and 5 I wanted the moon to be mostly full, so I used the top of the arc as a guide. It was difficult because you have to think in negative space. Remember, you cover with the tape is what will be showing when your done.


I used a solid black paint for the shadow on the moons. This one is Beguiling Black by Maybelline express finish. I have a step by step of what the painting looks like below. Tape all nails on one hand first. Then paint and remove tape immediately one nail at a time.


And just as an afterthought I added a stripe of silver in between the moon and the shadow. Here is what it looks like below.


Mooooon Shadow Moon shadow =]

| La


March 26, 2012

Tip: Alternating 3 Colors

This tip is simple and maybe obvious to some, but I just did my nails this way so I thought I’d blog it. It is about alternating 3 colors on your nails. First thing to mention I guess would be color. In my opinion, the best color combos are either all warm colors (reds, pinks, oranges, yellows) or all cool colors (greens, blues, indigos, purples). Another good way to do alternating colors is shades of the same color (like lavender, purple, dark purple). For this one I used some happy spring citrus colors, i.e. grapefruit, orange, and lemon. The polishes I used from left to right in the below photo: Essie in Mod Square, China Glaze in Peachy Keen, Sinful Colors in Pull Over.

Okay, so in terms of which colors to paint which nails. The obvious way to do it would be ABCAB CABCA. However, if you do it this way your pinky and pointer finger are polish A on both hands. In my opinion that pattern looks too symmetrical and a little funny looking. I would rather have none of my left side nails matching my right. So the is the pattern I decided on is: ABCAB CBACB. My painted nails are below. I think it looks more random which is what I wanted!

Have fun and happy polishing! <3 La

March 23, 2012

Technique: Crosshatched Tips


This technique was pretty darn simple. All you need is a nail art brush or polish. Here I used a Stripe Rite polish because its very easy to use and I had it in the color I wanted. I am sooo excited to see The Hunger Games tonight so I HAD to use another Hunger Games polish (last one I swear! Haha)

Below is the polish I used for the base coat. It is China Glaze in Agro. I did two coats.

I used a Metallic Gold Stripe Rite Polish for the cross hatch because the Agro polish had an obvious gold sparkle to it, I knew it would look great together. If you don’t have a nail art polish or a nail art brush you can just use a teeny tiny paint brush and dip it in nail polish. However I recommend one of the first two options because they are easier to control/use. You can get both at Sally Beauty supply.
To the left is a picture of the first step to the crosshatch. First I did a diagonal swipe of lines a couple millimeters apart. I did this on all ten nails in one direction. Be careful not to extend to the halfway point of the nail because then it stops looking like a tip design. I did these lines quickly and carefree. You want the lines to be a little messy. Straight lines would be boring ;-)
Next, I did the same process in the opposite diagonal. To the left is after the second crosshatch (I know, great pic quality!). The key to a good cross hatch is some thicker lines and some lighter and thinner lines.


Below is the final look! Soooo easy and so stylish. Happy Polishing!

<3 La